
Hypalon Glue and Patch Kit for Boat Damage and Inside Patches
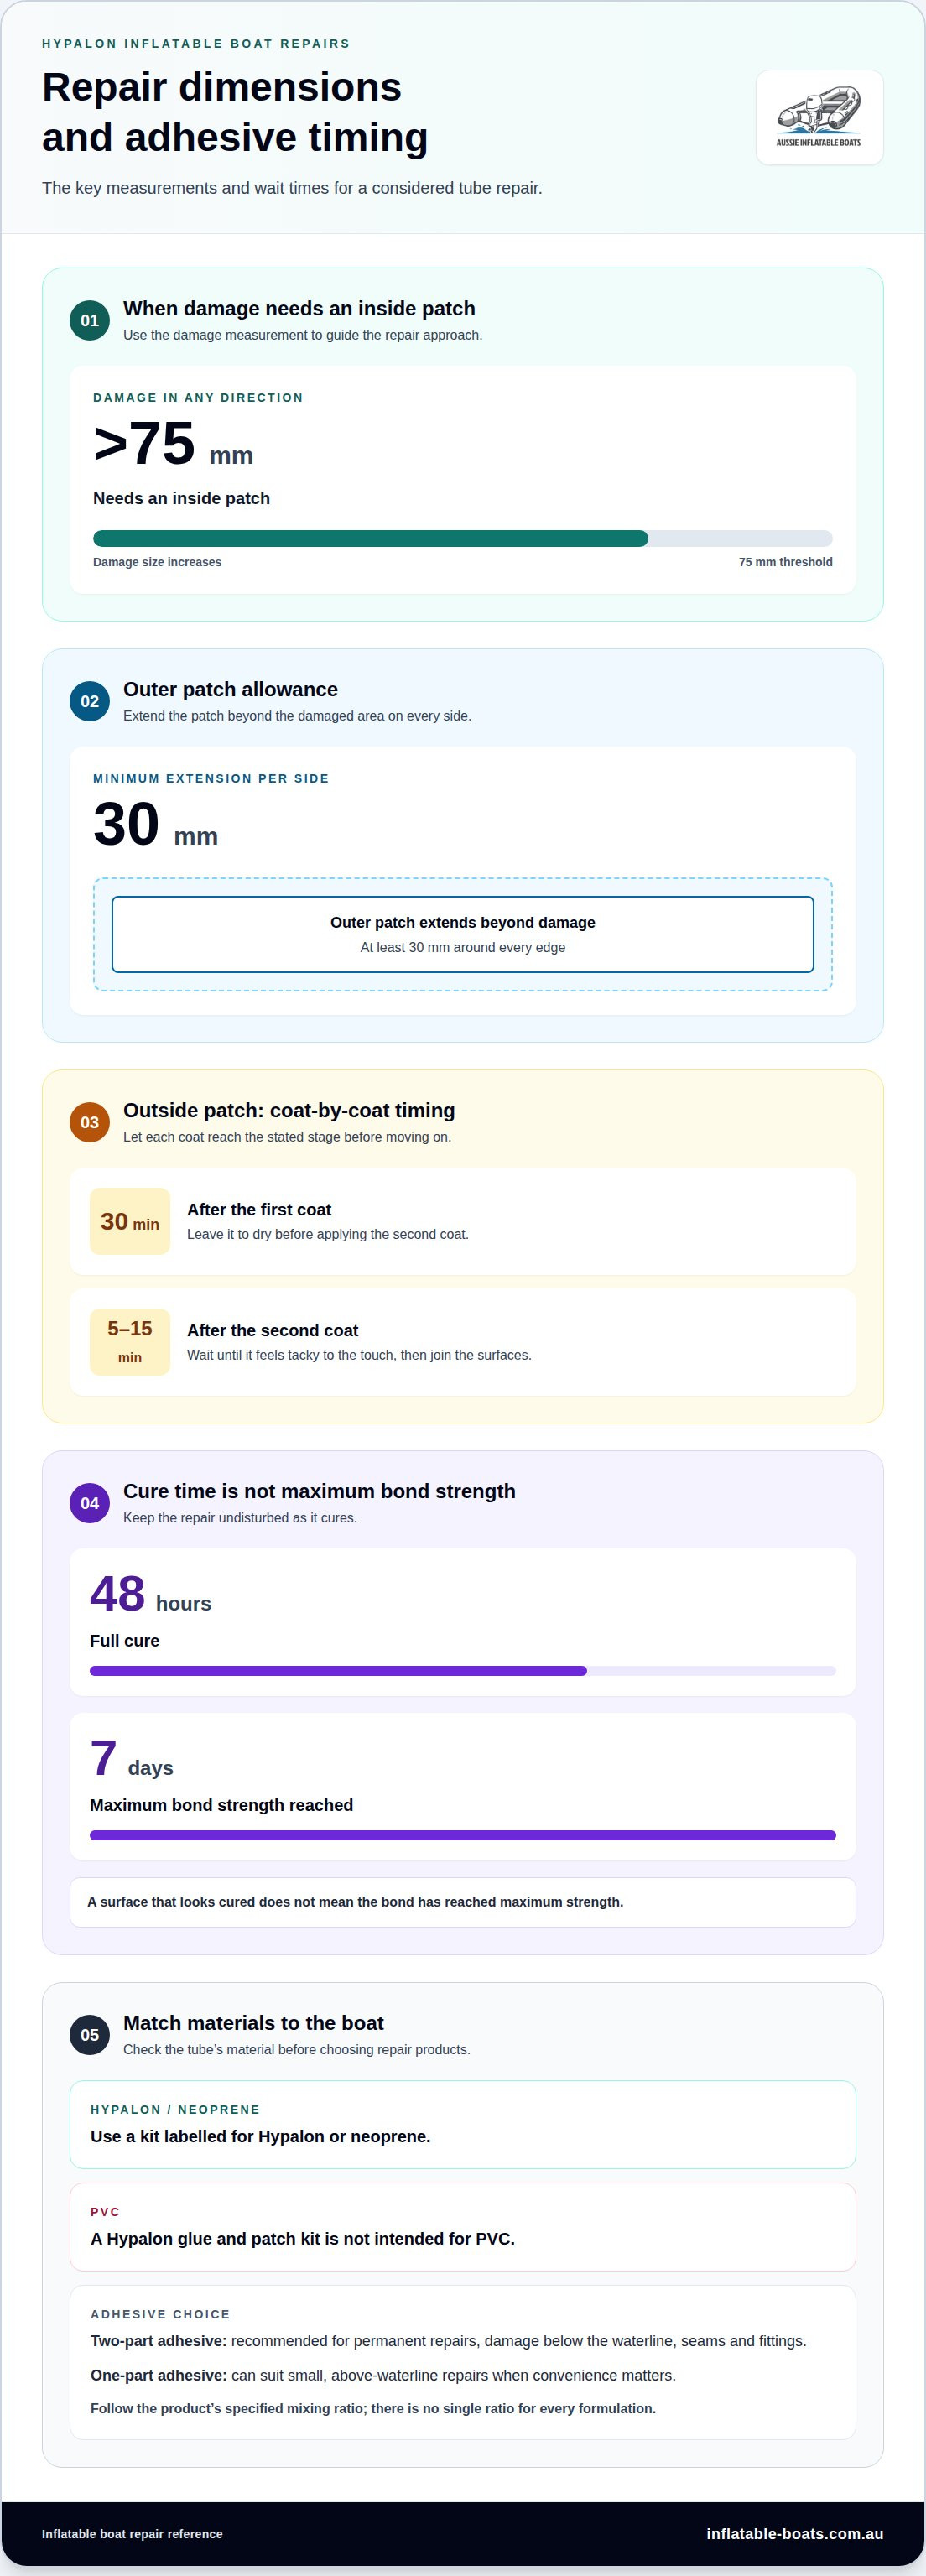
Damage size changes the repair: a Hypalon inflatable boat tube with damage more than 75 mm in any direction needs an inside patch, and the patch should extend at least 30 mm beyond the damage on every side. A Hypalon glue and patch kit is intended for Hypalon and neoprene, not PVC, so matching the adhesive to the boat’s material is essential.
A tear may look manageable from the outside, but a larger opening needs support from inside the tube as well as a sealed outer patch. A reliable repair depends on careful surface preparation, the right adhesive and curative mix, and the full curing time.
This guide explains how to prepare Hypalon surfaces, mix two-part adhesive as directed, and choose kit supplies for different repairs. You’ll also learn when an inside patch is needed, how to assess patch size, and what to consider before returning the repaired tube to the water.
Key Takeaways
- Match the adhesive to the boat fabric: Hypalon and neoprene repair kits aren’t intended for PVC.
- Mix adhesive and curative in the ratio specified for the product, and prepare clean, properly abraded surfaces for a sound bond.
- Choose the repair approach according to the damage’s size and position; larger tube damage can call for an inside patch as well as an outer repair.
- Use the kit’s tools to apply the adhesive carefully, then allow the patch to cure before returning the boat to use.
Adhesive and curative mixing ratio
Two-part Hypalon adhesive combines a base adhesive with a curative that activates the bonding system. Follow the mixing ratio specified for that adhesive. There is no single ratio for every formulation, so don’t estimate by eye or use a ratio from another product. The proportion matters: too much or too little curative can affect how the adhesive sets and bonds.
Before mixing, read the product instructions and prepare the patch, tube and tools. Mixed adhesive has a limited working life, so get each surface ready first. Measure the adhesive and curative using the specified units and a clean method. Add the curative to the adhesive and stir with a clean stirrer until uniform. Scrape the sides and base of the container to incorporate any unmixed material.
Two-part adhesives are recommended for permanent repairs, damage below the waterline, seams and fittings. One-part adhesive can suit small, above-waterline repairs when convenience matters. Let the repair location and adhesive instructions guide your choice. Don’t assume a one-part product is suitable for a seam or submerged repair simply because it is easier to apply.
Set up a warm, dry, well-ventilated workplace before opening the adhesive. Its solvents are highly flammable, so keep gas fires and other naked flames away. Don’t work beside a flame-heated tool or heater. Wear disposable gloves when handling the adhesive and curative, and close the container when you aren’t measuring or mixing. Follow the product’s safety directions for handling and ventilation.
Apply the adhesive in controlled coats rather than trying to build the bond with one thick layer. For an outside Hypalon patch, leave the first coat to dry for 30 minutes before applying the second. Then wait 5 to 15 minutes, until the second coat feels tacky to the touch, before joining the surfaces. Follow the adhesive instructions if they give different application directions for that formulation.
Bring the coated surfaces together carefully once the second coat is tacky. Align the patch before pressing it into place, because repositioning can disturb the adhesive layer. Apply firm, even pressure across the patch, paying attention to its edges. Leave the repair undisturbed as it cures: full cure takes 48 hours, while maximum bond strength is reached after 7 days. Don’t treat a cured-looking surface as proof that the bond has reached its maximum strength.
Cleaning surfaces with solvent
Adhesive bonds best to a prepared surface, not salt, grime, grease or loose material. First identify the fabric: a Hypalon repair kit is intended for Hypalon and neoprene, not PVC. Clean only the area needed for the patch, including its bonding face. Keep the work area dry, and protect cleaned surfaces from dust until you apply the adhesive.
Use the cleaner supplied or specified for the adhesive system. A glue-and-cleaner kit pairs products for the intended repair; it doesn’t mean every solvent is suitable. Don’t substitute household cleaners or an unlisted solvent. Other products may affect the fabric or leave residue that interferes with adhesion. Read the cleaner’s directions and use it only as directed.
Work methodically:
- Remove loose dirt and debris with a clean, dry cloth before using cleaner.
- Apply the specified cleaner to a clean cloth, following the product directions.
- Wipe the bonding area without spreading grime back across the fabric. Use a fresh part of the cloth as it becomes dirty.
- Allow the surface to dry as directed. Don’t apply adhesive over wet cleaner or visible residue.
- Keep the prepared area clear until the adhesive coats are ready to go on.
For an inside patch, the tube’s inner bonding surface needs abrasion as well as cleaning. Sand the back surface until it looks like suede, then remove the dust before applying cleaner. This textured finish prepares the material for bonding; cleaning alone isn’t enough. Don’t sand PVC accessories before attaching them with Hypalon adhesive.
Keep the patch and tube surfaces separate after cleaning. For instance, setting a cleaned patch face-down on a dusty bench can undo the preparation. Place it on a clean surface with its bonding side protected, and handle it by the edges. If prepared fabric picks up fingerprints, dust or workshop debris, clean it again using the specified method before applying adhesive.
Solvent cleaners can release fumes, so prepare the warm, dry, well-ventilated workspace before opening the container. Keep naked flames away from Hypalon adhesive because its solvents are highly flammable. Follow the cleaner and adhesive safety directions, and wear disposable gloves while handling the products. For repairs that need professional assessment, explore inflatable boat repair options alongside your preparation plan.
Hypalon inflatable boat repair kit
Hypalon is used for inflatable boat tubes; PVC is a different fabric and needs compatible repair materials. Identify the tube from its manufacturer’s label or boat documentation, not just its colour or surface appearance. In Australia, choose glue and patch materials labelled for Hypalon or neoprene, not PVC.
Choose a kit to suit the repair location and the damage. Two-part adhesive is recommended for permanent repairs, damage below the waterline, seams and fittings. One-part glue can suit small, above-waterline repairs when convenience matters.
Repair Materials for Hypalon
A Hypalon repair requires compatible patch material and adhesive, as well as cleaner to prepare the bond area. The patch fabric must suit the tube, not just match its colour. Check the material description before starting, since repair materials may not suit every fabric. Neoprene is also suitable for repair kits intended for Hypalon.
Assess the full repair area, including nearby seams and fittings. A tear near a seam may require a different approach from a small puncture on a flat tube panel. Damage exceeding 75 mm in any direction needs an inside patch, while the outer patch should extend at least 30 mm beyond the damage on every side. These measurements help establish the patch size and whether there’s room to position it correctly.
Suitable Glues and Patch Kits
Choose a Hypalon glue and patch kit labelled for Hypalon or neoprene, not PVC. A glue-and-cleaner kit listed at 250 ml is one example of a repair-kit format. Volume alone doesn’t establish suitability: material compatibility and the repair type are the deciding factors. A PVC-specific kit won’t provide the right match for Hypalon fabric.
Choose a compatible two-part adhesive for permanent repairs, seams, fittings or damage below the waterline. Mix the curative with the adhesive according to the product instructions. One-part glue is suited to smaller repairs above the waterline when convenience is the priority. Before starting, make sure the kit includes patch material and cleaner suited to the tube, plus adhesive for the repair.
Checking Repaired Tubes for Leaks
An inside patch must seal the chamber against escaping air. Once the repair is dry, inflate the chamber and inspect the patched area for leaks. Check the edges closely, as an incomplete bond can let air escape. If the chamber won’t hold pressure, the repair needs further attention before the boat returns to use.
Allow the repaired tube to dry for at least six hours before applying pressure. The full cure time for a Hypalon patch repair is 48 hours, so a leak check isn’t a substitute for allowing the adhesive to cure fully. After drying, inspect the repair and test the chamber, then leave it undisturbed through the complete cure period. That final wait helps the repair reach its intended bond strength.
Included repair tools and accessories
A repair kit’s tools help manage each stage, from surface preparation to adhesive application. The listed contents are a brush, a stirrer, two pieces of sandpaper and disposable gloves. Each has a specific role. Lay them out before opening the adhesive so a misplaced or missing tool doesn’t interrupt the repair.
- One brush: use it to spread adhesive evenly across the prepared bonding area.
- One stirrer: use it to combine adhesive and curative thoroughly for a two-part product.
- Two pieces of sandpaper: use them to abrade Hypalon where the repair instructions require it.
- Disposable gloves: wear them while handling adhesive, curative and cleaner.
Keep the brush and stirrer separate: the stirrer mixes the components, while the brush applies the adhesive. Mixing with the application brush can leave clumps or contaminate its bristles. Prepare the fabric and patch first, then mix the two-part adhesive in the specified ratio. This sequence keeps your tools ready while the adhesive is workable.
Use sandpaper carefully. For an inside Hypalon patch, abrade the tube’s back surface until it looks like suede, then remove the dust. Don’t sand PVC accessories before attaching them with Hypalon adhesive. Fabric type matters: a preparation step suited to Hypalon shouldn’t automatically be used on PVC. Keep sanding within the intended bond area.
Disposable gloves reduce direct contact with adhesive and curative, but don’t replace the product’s safety directions. Work in a warm, dry, well-ventilated space and keep naked flames away from Hypalon adhesive. Place the brush, stirrer and sandpaper on a clean surface. Dust or grime on a tool can transfer to the patch and compromise preparation.
D-rings and other fittings need a compatible patch and adhesive, positioned for their intended use. Before bonding a D-ring, identify the tube material and prepare its contact area as required. Decide on the fitting’s position before applying adhesive, so you aren’t rushing to align it once the surfaces become tacky. Don’t sand a PVC D-ring base for use with Hypalon adhesive.
Press the D-ring patch evenly onto the tube, paying close attention to its perimeter. Leave the bond undisturbed for the product’s full cure period before putting the fitting under load. A repair kit provides application tools, but the fitting’s placement and material compatibility still determine whether it suits the job. For a loose fitting or damage near a seam, professional inflatable boat repairs can address the bond and surrounding fabric together.
Damage size and inside patches
Measure a Hypalon tear or hole before choosing a patch: damage more than 75 mm in any direction needs an inside patch. Fit that patch so it extends at least 30 mm beyond the damage on every side, then seal the outside as required.
Assessing Damage Size
Start by examining the full damaged area, not just the most visible split. Measure the longest direction and the width across the opening; compare both with the 75 mm threshold. If either direction exceeds it, plan for an inside patch. A narrow tear can still cross that threshold lengthwise, even when its width looks small.
Next, allow room around the damage for the patch to bond to sound fabric. The patch must extend at least 30 mm beyond the damage on every side. For example, a tear needs enough patch material past both ends and both edges. Don’t size the patch to the opening alone. Check whether a seam, fitting or tube shape affects access and placement.
The size and location of the damage also guide the repair plan. A small puncture above the waterline differs from a long tear or damage below the waterline. These more demanding repairs may call for two-part adhesive, while a larger opening needs support from inside. If the fabric is split near a seam, assess the seam as part of the repair rather than treating only the visible hole.
Repairing Tears and Holes with Inside Patches
For a tear or hole that exceeds 75 mm in any direction, prepare an inside patch as well as the outer repair. The inner patch helps seal the chamber from within. First, make sure the patch can reach the damaged area through the opening. Prepare its bonding face and the tube’s inner surface for Hypalon adhesive.
Sand the tube’s back surface until it looks like suede, then remove the dust. Apply adhesive as directed and position the inside patch to cover the opening. Work carefully to avoid folds or gaps, since the inside patch must be airtight. Press the bonded area evenly, including around its perimeter.
For the outside patch, extend the material at least 30 mm beyond the damage on every side. Prepare the external surface, align the patch over the tear, and bond it using the adhesive’s coat and tack instructions. Don’t rush alignment; shifting a tacky patch can disturb the adhesive layer. Once dry, pump up the chamber and check for escaping air around the repair.
A large tear, awkward access or damage near a seam can make patch placement difficult. Get help assessing a damaged tube before choosing the repair approach.
Keep the inside Hypalon patch airtight. Once the repair is dry, inflate the repaired chamber and check for air leaks.
Inflatable Boats
Inflatable Boats can help you choose a practical next step. If the damage is large, near a seam or difficult to patch from inside, its Inflatable Boat Repairs service can address the tube damage. For a DIY repair, Inflatable Boat Accessories and Inflatable Boat Spare parts support your equipment and upkeep. Inflatable Boats also offers replacement craft.
The right option depends on the tube material, damage location and repair method. Share those details when you get in touch, especially if the tear exceeds 75 mm or needs an inside patch. Contact Inflatable Boats to discuss your boat repair or equipment needs.
Plan your next step with confidence
A repair is also a good time to make future maintenance easier. Note the tube material, damage location and repair method. This record can help you spot recurring wear and choose compatible materials if another repair is needed. Store remaining adhesive and patch supplies according to their product instructions, ready for future maintenance. For broader workshop maintenance and upkeep, specialist distributors such as Fosseway Tapes & Fixings Limited supply a wide range of industrial adhesives and abrasives.
A Hypalon glue and patch kit is suitable only for the materials and repair tasks specified for its adhesive. If you’re unsure whether you can handle a repair, or the damage affects a seam or fitting, Inflatable Boats offers professional repair support to help address it. The company also offers inflatable boats, accessories and spare parts for your boating needs.
For help with your next repair or the equipment that supports it, contact Inflatable Boats. Make a considered plan, then get back to enjoying time on the water.
Frequently Asked Questions
What tools and materials are needed to patch a Hypalon inflatable boat?
You’ll need Hypalon-compatible patch fabric, adhesive and cleaner, along with tools to prepare and apply them. A typical kit includes a brush, stirrer, sandpaper and disposable gloves. First identify whether the tube is Hypalon or PVC, since the materials aren’t interchangeable. Prepare a clean work surface too, so the patch and tools don’t collect dust before bonding.
What temperature, humidity and curing time are required for Hypalon adhesive?
Use Hypalon adhesive in a warm, dry workplace, and follow the product’s instructions for temperature and humidity. Avoid applying it in damp conditions, which can interfere with surface preparation and bonding. A repaired tube should dry for at least six hours before pressure is applied. Full cure takes 48 hours, with maximum bond strength reached after 7 days, so plan the repair around those stages.
What safety precautions and risks apply when using Hypalon glue?
Hypalon adhesive contains highly flammable solvents, so keep gas fires and naked flames away throughout the repair. Work in a well-ventilated space, wear disposable gloves, and follow the adhesive and cleaner directions. Close containers between uses and avoid contact between solvents or adhesive and unprotected skin. Set up your tools before opening the products to reduce unnecessary handling while measuring or applying them.
Can Hypalon glue repair seams, valves and large tears, or is professional repair needed?
Two-part Hypalon adhesive is recommended for permanent repairs, seams, fittings and damage below the waterline. Tears exceeding 75 mm in any direction need an inside patch, so access and alignment matter as much as the adhesive. Valve problems can involve the fitting and surrounding tube material; Inflatable Boats offers repair services for valve issues and other inflatable boat damage. Use professional repair support when the job involves structural areas or difficult access.
What are the best Hypalon glue and patch kits available in Australia, and how do they compare?
Choose a kit labelled for Hypalon or neoprene, not PVC. Two-part adhesive is recommended for permanent, below-waterline, seam and fitting repairs; one-part glue is suited to small repairs above the waterline. A 250 ml glue-and-cleaner kit is one listed format.