
Fitting a fish finder to an inflatable: where to mount it
Yes, fitting a fish finder to an inflatable is practical when the transducer sits in clean water and the mount suits the boat’s layout. Position the screen where it is easy to see from your usual operating position, and keep the transducer clear of turbulence and nearby hardware. With both in the right place, the fish finder can help you read the water as you explore.
The main challenge is that an inflatable often has fewer rigid mounting points than a conventional boat, and space around the stern can be limited. Start with the transducer: its position affects the reading, while a secure, removable mount makes the equipment easier to manage between trips.
This guide covers practical transducer positions, including mounting arms and removable transom brackets, and explains how to place the display within easy view. It also outlines cable routing and what to consider when choosing a fish finder setup for an inflatable. Careful positioning helps the equipment work reliably without obstructing boat hardware or getting in the way on the water.
Key Takeaways
- Use a boat handle as a possible support for a transducer arm, while keeping the sensor in the water and clear of nearby fittings.
- Position the transducer away from propeller wash and turbulence so its reading is less likely to be disturbed.
- Place the display where you can see it from your operating position without obstructing movement around the boat.
- Choose a removable mounting approach that suits the inflatable’s transom or tube, and avoid fixing a bracket through an air chamber.
- Consider a floating, wireless castable transducer if you want a fish-finder option that doesn’t need a permanent mount.
1. Transducer placement using a boat handle
A boat handle can provide a mounting point for a removable transducer arm. The arm passes through the handle and lowers the transducer into the water, avoiding a permanent fitting through the inflatable tube. For fitting a fish finder to an inflatable, this can work well when the boat has no dedicated transducer bracket.
First, check the handle with the boat inflated and ready for use. Choose one near the stern where the arm can reach the water without pressing against the hull. The handle should stay steady as the boat moves. If it flexes or twists under gentle pressure, it may not provide a stable mount.
Position the arm so the transducer’s sensing face sits below the waterline and points as directed in the manufacturer’s instructions. Keep the sensor clear of the hull, fittings and arm. A tilted or obstructed transducer can disrupt the sonar signal, so adjust the arm before tightening the clamp or other fixing.
Run the cable along the arm, then route it to the fish finder without stretching it across a walkway. Leave a service loop near the motor so steering movement cannot pull the transducer cable tight. Secure loose sections to prevent snagging, but do not pinch the cable beneath a clamp or handle.
Test the position afloat before treating it as final. Check that the transducer stays submerged and does not swing into the hull. Then move at a controlled pace and watch for noisy or interrupted readings. If the display loses its return, adjust the transducer’s depth or angle and test again.
Test with the motor operating as well as while drifting. Water flow changes can affect the reading, so a position that works while stationary may behave differently underway. Turn the motor through its steering range and check that it does not tug the cable or shift the arm. Reposition the mount if it does.
Protect the display and electrical connections from spray with suitable covers, and keep connectors dry when connecting or disconnecting the unit. After saltwater use, wipe salt from exposed mounts and cable surfaces, then secure the wiring against vibration without crushing it.
A handle-mounted arm works best when it holds its position and can be removed for transport. If the handle moves or the transducer cannot sit clear of the hull, choose another mounting point rather than forcing the setup. A short water test can confirm the arm’s position before a longer trip.
2. Avoiding propeller wash, turbulence and boat hardware
A transducer needs undisturbed water beneath its sensing face. Propeller wash, bubbles and turbulence can interrupt the sonar return, causing clutter, gaps or inconsistent readings. On an inflatable with an outboard, the stern is crowded: motor movement, the transom and fitted hardware all affect where the sensor can sit.
Start by checking the propeller’s path through the water. Keep the transducer out of the churn immediately behind the propeller, where aerated water can pass beneath the sensor. Don’t assume one side of the motor is always clear. Propeller rotation, motor position and the boat’s layout affect water flow, so assess the actual arrangement before securing the mount.
Look for smooth water beside the transom when the boat is moving. A sensor too close to the hull may sit in disturbed flow, while one too far out can be exposed to spray or impact. Keep its face level as directed by the fish-finder manufacturer, and make sure the arm cannot swing towards the propeller.
Check nearby fittings before choosing a mounting point. Transom handles, drain plugs, tie-down points, boarding ladders and motor brackets can obstruct the sensor or restrict its view. A bracket that clears the hardware with the motor straight may foul it during a turn. Move the motor through its steering range and check for contact before heading out.
Common problems include noisy or dropping sonar readings, a transducer that lifts out of the water, and an arm that strikes nearby hardware. Move the sensor into cleaner water, adjust its depth or angle, then test again at a controlled pace.
Make one change at a time. Observe the fish finder while stationary, then check the reading at low speed and during a turn. If the image degrades only underway, propeller wash or hull turbulence may be responsible. If it drops during a turn, check the arm, cable and motor clearance for movement or contact.
Test again after repositioning the sensor. A calm reading at rest does not confirm the placement will work underway, and a clean return in a straight line does not rule out interference during a turn. Secure the mount without forcing it against a tube or transom fitting. Keep the transducer clear of the propeller and moving hardware.
For a boat with crowded stern fittings, a removable mount can help place the transducer where the water runs cleanly without obstructing the motor. Browse the inflatable boat range to see the different layouts that can influence mounting space.
3. Display positioning
Mount the display where the helmsman can read it without turning away from the direction of travel. On an inflatable, the right position depends on the seat, tiller and available bench space. Sit in your usual operating position first, then find a spot that stays visible while you steer and scan the water.
An aluminium bench seat can support a fish-finder display with a StarPort mount, keeping the screen off the inflatable tube and near the operator. Check that the mount does not take up space needed by passengers, fishing gear or movement around the boat. The seat should remain practical for other uses.
Set the screen angle to suit your seated eye line. A display tilted too far upwards can catch reflections, while one angled downwards may be hard to read without leaning forward. Check visibility in changing light by moving your head slightly, rather than relying on one ideal position.
Screen size affects how much information is comfortable to read. One reported setup found it difficult to view two screens simultaneously on a 5-inch display. If your unit shows several panels, test the split-screen layout before fixing the bracket. Enlarging the key display pane can make essential sonar information easier to follow.
Keep the display within easy reach, but clear of the tiller’s full movement. Turn the tiller through its steering range and check that you can operate the fish finder without crossing the controls. The screen should not block your view over the bow or interfere with a passenger’s position.
Plan cable routing before tightening the display mount. Run the power and transducer cables together only where the installation allows, and secure them so they do not trail across a seat or walkway. Leave enough slack for the screen to tilt or detach, but avoid loops that could catch fishing tackle.
Consider removing the display between trips. A detachable mount makes it easier to stow the unit and keep the bench available for other uses. Check that the screen locks firmly in place during operation, and that removing it will not pull on the cables or disturb their routing.
Before settling on a position, sit at the helm and test the screen with the boat arranged as it will be used. Check visibility, reach, glare and room to move around the seat. A position that works for one operator may not suit another, so prioritise the person steering and make sure the display is readable without distracting from the water ahead.
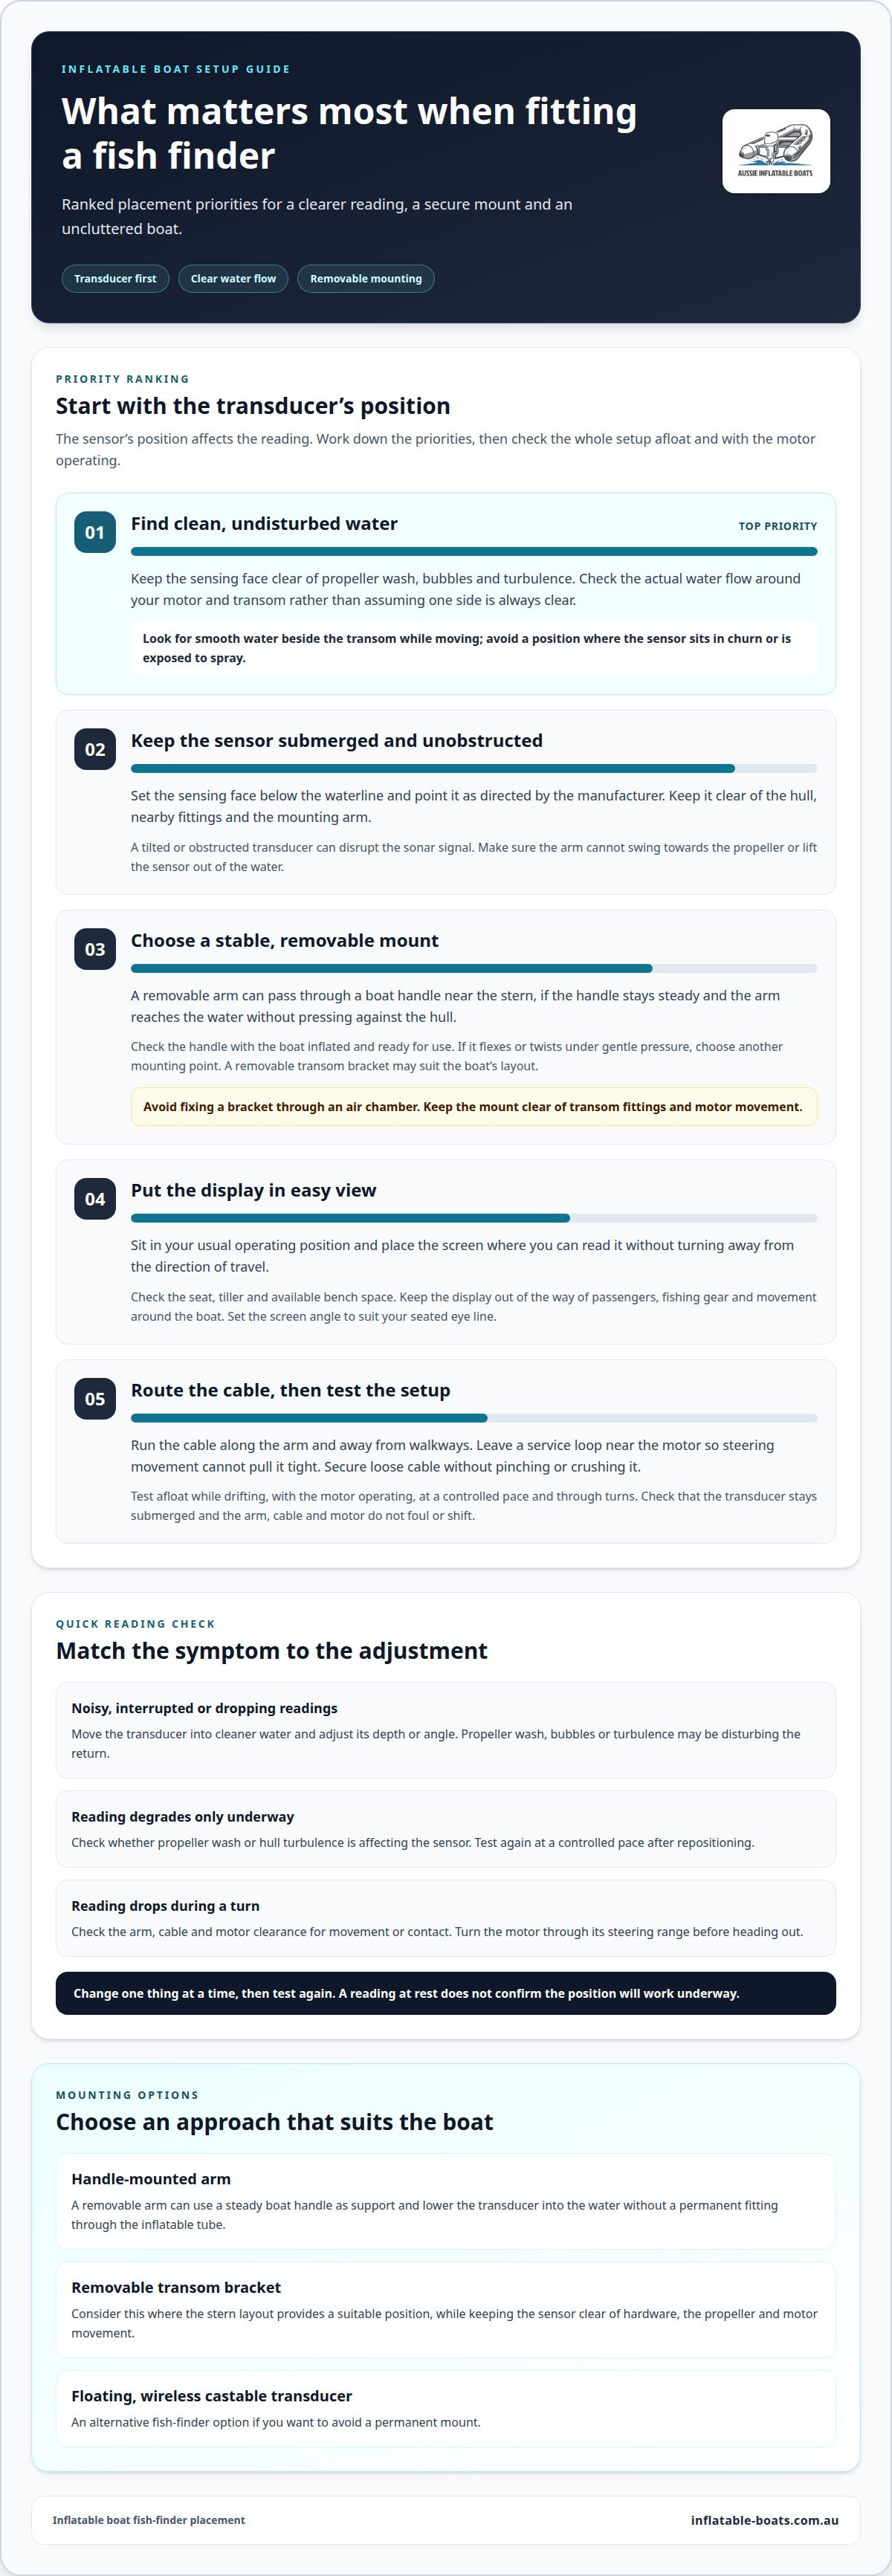
4. Transducer position on an inflatable boat
Choose a mount that holds the transducer in clean water without puncturing an inflatable chamber. A suction-cup mount suits a smooth, firm surface, but may shift on textured or flexible material. A removable transom bracket or arm offers a more stable option when the boat’s layout allows.
QuickLok fittings can secure a transducer arm, including a Transducer Arm XL with an extender clipped into a tube mount. Another option is a removable bracket that clips onto the transom. Both avoid permanent changes and keep the sensor accessible for adjustment and removal.
For a suction cup, press the mount onto a clean, flat surface and test its hold before launching. For a transom bracket, make sure it sits firmly and clears the motor throughout its steering range. Never drill into an inflatable chamber to fit a fixed bracket, as a puncture can compromise the boat.
In Australia, install the fish finder and battery according to their manufacturers’ instructions, and keep the mount clear of inflatable chambers. Boating requirements can vary between states and territories, so do not treat one mounting method as a universal legal rule.
There is no single cost for a fish finder and inflatable-boat mounting kit in Australia. The total depends on the fish-finder unit, display, mount and battery selected. Removable arms, transom brackets and suction mounts are different components.
Battery capacity and runtime depend on the fish finder’s power draw and operating time. Use the unit’s stated current consumption to choose a suitable battery, then account for other connected equipment and the time you expect to spend on the water.
A transducer can work inside a hull only if its design and the material allow sonar to pass through effectively. Air gaps, flexible layers or an unsuitable mounting surface can weaken the signal, so placing it inside an inflatable chamber is generally a poor choice.
Before settling on a position, test the mount afloat and check the fish finder’s reading while stationary and underway. Confirm that the arm stays secure, the transducer remains submerged, and the motor and nearby fittings move freely. A removable setup makes it straightforward to reposition the sensor if the first location produces a disrupted return.
5. What fish finder features and transducer type suit an inflatable boat?
Start with how you fish, then match the display and transducer to the boat’s layout. A compact unit can suit an inflatable with limited bench space, while a larger screen may be easier to read from the operating position. Prioritise clear information, simple controls and a removable mounting method.
Screen size is a practical trade-off. A 4-inch display showing several panels at once can demand good eyesight, so consider whether you’ll use split-screen views or one main sonar panel. A 5-inch screen can still make two simultaneous views difficult to follow. Try the layout from your usual seat before choosing a mounting position.
Check the transducer’s requirements. A conventional transom transducer needs a mount that holds it in the water, and its cable must reach the display without crossing a walkway. Make sure the transducer connection matches the fish finder, and follow the manufacturer’s instructions for orientation and operating depth.
For a simple, removable setup, some castable fish finders use a floating transducer that connects wirelessly to a phone and needs no installation. This avoids mounting a sensor to the inflatable, but requires a compatible phone as the viewing screen. Consider whether that suits your fishing position and how you will keep the phone accessible.
Power is another selection factor. Compare the fish finder’s stated power draw with the battery you plan to use, then consider how long the unit will run during a typical outing. A separate battery can go in a plastic box, either an off-the-shelf option or a DIY enclosure. Secure it against sliding, and keep wiring clear of water and moving equipment.
Choose controls you can operate from the helm without leaning across the boat. For example, a unit with a clear main sonar view may be more useful than a screen crowded with panels you rarely consult. Check that the display, transducer and power connections are compatible before assembling the setup.
Keep the system removable if you pack the inflatable away after fishing. A detachable display and portable transducer can simplify storage, while a fixed installation may suit a boat kept assembled. Choose according to the available mounting points, passenger space and how you transport the boat.
Use these feature choices to narrow the setup, then explore boat layouts for your fishing setup.
Inflatable Boats
Inflatable Boats is a natural next step if you are choosing a boat layout or accessories for your fish-finder setup. The transom, bench arrangement and available mounting points can all affect where the display and transducer fit, so consider these details alongside how you plan to use the boat.
Inflatable Boat Accessories and Inflatable Boat Spare parts can support your setup, while Inflatable Boat Repairs are relevant if a boat needs attention before equipment is mounted. These options help you plan around the boat itself, not just the electronics. For help with your inflatable boat or its equipment, contact Inflatable Boats.
Plan a setup that fits your next trip
Before choosing equipment, consider how you use your inflatable: whether it stays assembled, how you transport it and how much space you need aboard. Those choices shape a practical setup that works beyond the first day on the water. Treat fitting a fish finder to an inflatable as part of planning the boat’s layout, so the electronics support your time afloat rather than getting in the way.
A well-matched arrangement should feel natural at the helm and suit the way you explore. If you’re weighing up boat and accessory options for your plans, contact Inflatable Boats for advice.
Take the next step with a clear idea of how you want to use your boat, and make room for more confident days on the water.
Frequently Asked Questions
Can I mount a fish finder on an inflatable boat?
Yes, you can mount a fish finder on an inflatable with a removable display mount and suitable transducer support. For example, a transducer arm can pass through a boat handle or attach to a compatible tube mount. Keep the installation clear of the motor and passenger space, and choose components suited to the boat’s construction. A floating, wireless transducer is another option if you want to avoid a fixed installation.
Do I need to drill the transom?
No, drilling is not essential: a removable bracket can clip onto the transom, and a transducer arm can use a compatible tube mount. Never drill an inflatable chamber to attach a fixed bracket. If you plan to fix anything to a rigid transom, follow the boat and mount manufacturers’ installation instructions, including any requirements for sealing holes and maintaining the transom’s integrity.
How do you route the display, cable and battery?
Place the display within the operator’s view, then route its power lead and transducer cable along a protected path to their connections. For example, secure cables beside a seat or mount rather than across a walkway. Keep connectors away from standing water, leave enough slack for steering and removable components, and avoid tight bends, pinched sections or loose loops that could catch gear.
Should I glue a transducer to the inflatable tube?
Do not glue a transducer directly to an inflatable tube unless its manufacturer specifies a suitable method for that boat material. The tube’s curved, flexible surface can make alignment and a secure bond difficult. A removable arm or compatible tube mount keeps the transducer accessible for adjustment and storage. An internally mounted transducer also needs a suitable surface and a clear signal path.
Where do I put the sounder battery?
Place the battery in a secure plastic box where it will not slide, obstruct passengers or interfere with the motor. For example, position it near the display if that keeps the power lead tidy, while keeping the box and connections away from water. Secure the cable without crushing it, and keep the battery accessible for disconnecting or packing away the sounder.
Where should a transducer go on an inflatable boat?
Position the transducer at the stern, where its sensing face stays submerged in clean water and clear of the propeller’s churn, hull and fittings. A handle-mounted arm or removable transom bracket can support it without fixing through an inflatable chamber. Check the sensor’s angle and clearance with the motor turned through its steering range, then test the reading while moving.
Which mount should you choose?
Choose a mount that suits the boat’s structure, transducer and storage routine. A removable transom bracket suits a compatible transom; a tube mount or arm can work where the layout offers a secure attachment point. QuickLok fittings are one option for a transducer arm. A display can also attach to an aluminium bench seat with a StarPort, keeping it off the inflatable tube.
Will a portable suction mount work?
A portable suction mount can work on a smooth, flat surface, but its hold depends on the surface and how well it seals. Inflatable material may flex or have a texture that prevents reliable suction. Treat it as a removable option, not a permanent fixing, and check that it stays in place before relying on it underway. A clip-on bracket or arm may suit an uneven surface better.