
Best Glue for Hypalon Repairs: A Practical Buying Guide
The easiest glue to apply may be the wrong choice for a repair that needs to hold on the water. So, what is the best glue for Hypalon repairs? Choose an adhesive explicitly intended for Hypalon or a compatible fabric, prepare the surface as directed and apply it within the product’s stated conditions. A general-purpose or PVC glue is not a reliable substitute.
It’s understandable to want a simple fix, especially when a lifted patch could let air escape or put a boat out of action. One-part and two-part adhesives have different handling requirements. A one-part product may involve fewer steps, while some two-part formulations are used for air-holding repairs and components under stress. The right choice depends on the specific adhesive, the repair and your ability to follow its instructions.
This guide explains how to compare Hypalon-compatible adhesives, what to consider before buying and why careful surface preparation matters. It also covers when a repair is better handled professionally. If the damage is extensive, highly stressed or difficult to assess, Inflatable Boats provides professional inflatable boat repair and restoration to help you choose a practical next step.
Key Takeaways
- To answer “what is the best glue for Hypalon repairs”, first identify the fabric and choose an adhesive labelled for Hypalon or a compatible material.
- Compare one-part and two-part adhesives by their handling and mixing requirements. Follow the product directions for any supplied hardener or curative.
- Use a buyer checklist to match adhesive compatibility, repair purpose and working conditions to the manufacturer’s preparation instructions.
- Assess the damage before you begin. Extensive, seam-related or structurally important repairs may call for professional attention.
- Use a clear process to select and prepare for a repair, while treating the adhesive manufacturer’s instructions as the authority for the job.
What Is the Best Glue for Hypalon Repairs? Start With the Fabric
Start by identifying what your inflatable boat is made from, rather than choosing an adhesive by brand or format. For Hypalon, select a repair adhesive explicitly labelled for Hypalon or for a fabric the manufacturer identifies as compatible. A universal glue may stick to some materials in some circumstances, but that doesn’t make it suitable for flexible, air-holding boat fabric exposed to movement and water.
Household glues and adhesives intended for other boat fabrics aren’t reliable substitutes just because they appear to stick. PVC and Hypalon have different surface characteristics, so don’t assume an adhesive made for one will work on the other. A dependable repair also relies on preparing the surface and applying the adhesive as directed.
That’s why the question what is the best glue for Hypalon repairs can’t be answered by choosing between one-part and two-part products first. Those formats matter, but compatibility comes before convenience. Confirm the material, then compare adhesives intended for it.
How to identify Hypalon before choosing an adhesive
Use boat documentation or material guidance from the boat’s manufacturer to identify the fabric. Appearance alone can mislead: coated fabrics may look similar, and colour or texture isn’t enough to confirm the material. If you’re unsure, pause before buying adhesive. The related Hypalon and PVC fabric comparison explains the distinction in more detail. The key is not to choose glue based on appearance alone.
Hypalon, also known as Hypalon (chlorosulfonated polyethylene), is a synthetic rubber. That matters because a repair adhesive needs to form a suitable bond with the fabric’s surface, not merely appear to stick during an initial test.
What a Hypalon adhesive label should tell you
Read the product information, not just the front of the container. Look for wording that explicitly names Hypalon or confirms compatibility with the fabric you’re repairing. Then check whether it’s a one-part adhesive or a two-part system. For a two-part product, the instructions should explain how to use the supplied hardener or curative, including the required mixing process.
Review the complete repair procedure as well. Check the specified surface preparation, application method, conditions for use and cure guidance before putting the repair under load. Don’t substitute a familiar cleaner, roughening method or timing from another adhesive system. Products can differ, and following the chosen adhesive’s preparation and application instructions gives the repair its best chance of holding.
One-Part or Two-Part Hypalon Adhesive: Which Suits Your Repair?
Once you’ve confirmed the fabric, choose between one-part and two-part adhesive by considering the product instructions and demands of the repair. Neither format is automatically better, and a one-part adhesive isn’t always the easiest or most suitable option. A small, straightforward patch and a more demanding repair may call for different handling, but the adhesive must be specified for Hypalon either way.
| Consideration | One-part adhesive | Two-part adhesive |
|---|---|---|
| Handling | May involve fewer preparation steps if the product instructions say it can be used as supplied. | Requires the adhesive and supplied hardener or curative to be mixed as directed. |
| Mixing | No separate curative is required unless the product instructions state otherwise. | Requires accurate mixing according to that product’s specified process. |
| Application planning | Follow the product’s own preparation, application and cure guidance. | Plan for mixing and application within the product’s stated usable time and conditions. |
| Instruction demands | Can be more straightforward to handle when its instructions involve fewer steps. | Needs careful attention to mixing, timing and the full application procedure. |
Use this comparison to understand the work involved, not to assume a format guarantees a particular bond. For both types, compatibility and the specific repair instructions remain decisive.
When a one-part adhesive may be the more practical option
A one-part adhesive may be simpler to handle if the manufacturer specifies that it can be applied without mixing a separate curative. That can make it practical when the product’s stated use suits the job and its instructions are manageable. But one-part doesn’t mean universal. Verify Hypalon compatibility and check the repair against the product’s stated limits. Don’t assume it’s suitable for extensive or highly stressed damage.
What to consider with a two-part Hypalon adhesive
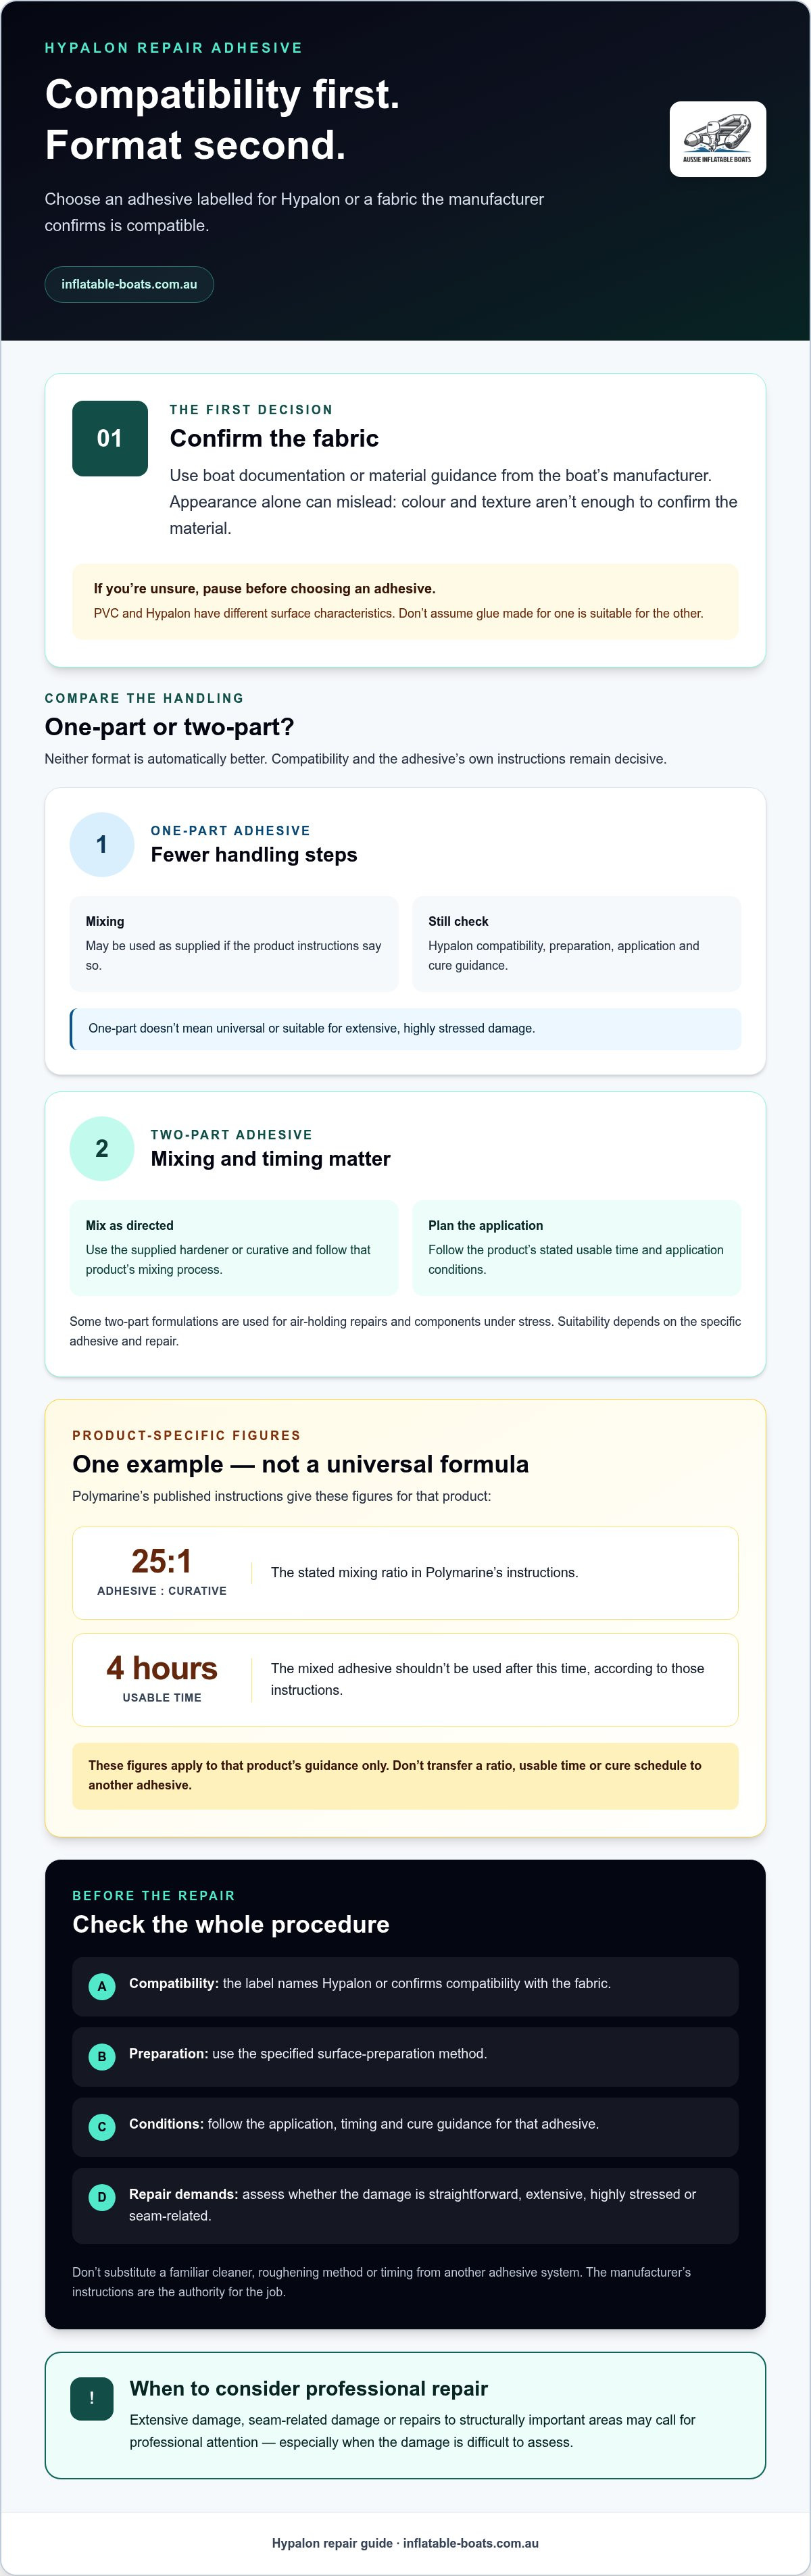
A two-part adhesive adds a mixing step, so accuracy matters. Use only the supplied hardener or curative, follow the manufacturer’s process and keep to the stated timing and application conditions. Polymarine’s published instructions, for example, give a 25:1 adhesive-to-curative ratio and state that the mixed adhesive shouldn’t be used after four hours. Those figures apply to that product’s guidance, not to other brands.
Never transfer a mixing ratio, usable time or cure schedule from one adhesive to another. Even products intended for the same fabric can have different directions. Check the label and current instructions for the adhesive you’re using, including how to mix it, how long it remains usable and when the repaired area can return to service. If the process feels difficult to control, professional inflatable boat repair support is an alternative to a DIY repair.
So, what is the best glue for Hypalon repairs? Choose a compatible product whose handling requirements you can follow for the job. Don’t buy on format alone. Compare the work involved, then use the manufacturer’s directions to guide your decision.
Compare Hypalon Repair Adhesives by Compatibility, Conditions and Use
Once you’ve narrowed your options to adhesives intended for Hypalon, compare how well each product’s instructions suit the repair and the conditions you can work in. A compatible adhesive can still be a poor match if you can’t follow its preparation steps, application limits or handling requirements.
Use this checklist to compare candidates:
- Fabric and patch: Does the product information identify Hypalon or the relevant compatible fabric? Is the patch material suitable for the boat fabric?
- Repair purpose: Is the adhesive described for the type of repair you need, such as a patch, seam or fitting?
- Handling: Do the format and application process suit your tools, workspace and ability to follow the instructions?
- Working conditions: What conditions does the manufacturer specify for preparation, application and curing?
- Safety guidance: What precautions does the product label and safety information require for ventilation, protective equipment and ignition sources?
Match adhesive instructions to the repair and the fabric
A small puncture that can be reached and prepared cleanly is a different job from a lifting seam, a fitting under repeated strain or damage affecting the boat’s structure. The adhesive’s stated use matters, but compatibility alone doesn’t establish that it suits every kind of damage. Check whether the instructions cover the intended application, and don’t infer a repair size or limit the manufacturer hasn’t provided.
The patch matters too. It needs to suit the boat fabric, and the adhesive must be compatible with both materials being joined. If the repair involves a seam, fitting or structural area, consider whether the work goes beyond a straightforward patch before choosing a product.
Why workshop conditions and preparation matter
Bonding starts before you apply the adhesive. Dirt, grease, moisture or residue can interfere with contact between surfaces. Working conditions that fall outside the product’s stated limits may also affect application or curing. Follow the chosen adhesive’s directions for cleaning, abrasion and application. Don’t borrow a solvent or surface-preparation method from another product, because instructions are specific to each system.
Read the product label and safety information before opening the container. Some repair processes involve solvents that produce flammable vapours. Follow the manufacturer’s ventilation guidance, keep flames and other ignition sources away as directed, and use any specified protective equipment. Requirements vary, so don’t assume one set of conditions applies to every adhesive.
Ultimately, what is the best glue for Hypalon repairs depends on the fabric, repair purpose and conditions you can control. If the damage is extensive, seam-related or structurally important, choosing an adhesive alone doesn’t make it a suitable DIY job. A professional assessment may be the more dependable next step.
How to Choose and Use Hypalon Glue Without Guesswork
A reliable repair starts with a clear sequence, not guesswork at the workbench. Use these steps to decide whether a DIY repair is appropriate and prepare for it. They’re a planning guide, not a replacement for the instructions supplied with your chosen adhesive.
A practical checklist before opening the adhesive
- Identify the fabric. Use the boat’s documentation or reliable material guidance. Don’t select a product based on appearance alone.
- Assess the damage. Identify whether you’re dealing with a puncture, a lifted patch, a seam, a fitting or damage that may affect the boat’s structure. Note the location and extent without assuming a repair limit.
- Match the materials. Confirm the adhesive is labelled for Hypalon or a compatible fabric, and that the patch material suits the boat fabric and repair purpose.
- Read the full instructions. Check the mixing process, surface preparation, application method, safety precautions and cure guidance before you begin.
- Set up as directed. Gather the required materials and prepare the work area according to the adhesive manufacturer’s instructions. If you can’t meet the specified conditions or follow the steps with confidence, pause rather than improvise.
- Follow product-specific timings. Take any mixing ratio, usable time after opening or mixing, and curing guidance only from the chosen product’s label or instructions. Don’t transfer figures from another brand or format.
Adhesive compatibility and correct surface preparation are separate requirements. Choosing a suitable glue doesn’t compensate for a contaminated surface or a preparation method that conflicts with the product directions. Likewise, careful preparation can’t make an adhesive intended for a different fabric suitable for Hypalon.
Keep the instructions with your repair materials while you work. That makes it easier to follow the right sequence, especially if the adhesive requires multiple stages. Don’t rush the process, change the specified preparation or put the repaired area into service before the stated cure guidance allows.
When to pause a DIY repair and seek specialist help
Some repairs demand more than careful glue selection. Extensive damage, a damaged seam, a stressed fitting or an area that may be structurally important calls for professional assessment. Pause, too, if you can’t confidently identify the fabric, understand the damage or carry out the specified procedure. Uncertainty is a sound reason to stop, not a challenge to push through.
If the repair involves a damaged boat component rather than a simple patch, consider whether the relevant inflatable boat accessories or spare parts could help address what needs attention. For complex damage, professional inflatable boat repair and restoration is a practical alternative to attempting work you’re not equipped to complete.
If the damage is beyond a confident DIY repair, explore professional inflatable boat repair options before returning the boat to the water.
When Professional Hypalon Repair Is the Better Choice
A DIY repair lets you handle a straightforward job yourself, but it also puts the responsibility for material identification, surface preparation and application on you. If the damage is difficult to assess or the repair involves precise work in a critical area, convenience may not outweigh the risk of a bond that doesn’t hold as intended.
Choosing glue is only one part of the decision. Even an adhesive labelled for Hypalon can’t make every repair suitable for DIY. Consider the damage, its location and whether you can follow the product’s instructions accurately. A recurring leak, for example, may point to an unresolved issue rather than a simple patching job. Don’t keep applying adhesive without understanding why the repair hasn’t lasted.
Signs the repair may need professional assessment
Consider professional help if damage is extensive, returns after a repair, or sits around a seam, fitting or structurally important area. These locations can involve more than attaching a patch, and the right repair method depends on the damage and boat fabric. There’s no universal size threshold that determines what can be repaired. If you’re unsure about the fabric or how to proceed, stop before applying adhesive.
- Damage that keeps recurring: Repeated failure deserves assessment before another repair attempt.
- Seams or fittings: Areas that join fabric or carry attached components may need more involved work than a simple patch.
- Structural concerns: If the damage could affect the boat’s structure, don’t treat it as an ordinary surface repair.
- Uncertainty: If you can’t confidently identify the material or follow the repair procedure, pausing is the sensible choice.
The best answer to what is the best glue for Hypalon repairs may be to leave the work to a professional when the damage or application is beyond your confidence. That’s not a failure of DIY. It’s a practical decision about the time, accuracy and care needed to repair an inflatable boat properly.
How repair support can help protect time on the water
Professional repair and restoration is an option when a job calls for experienced assessment or careful application. Inflatable Boats repairs and restores inflatable boats, helping owners move from uncertainty towards a considered repair plan. No adhesive choice can guarantee an outcome, but matching the work to the damage is a sensible place to start.
If your boat has extensive, recurring or seam-related damage, discuss the repair before attempting another patch. Contact Inflatable Boats about its inflatable boat repair service to talk through your repair needs and next steps.
Make Your Next Repair Decision with Confidence
A repair is part of keeping your boat ready for the water. Before committing to a DIY fix, consider not only what adhesive to buy, but whether you can complete the work carefully and confidently. Asking what is the best glue for Hypalon repairs is a useful starting point. When the damage gives you pause, deciding who should carry out the repair is just as important.
If you’d prefer a professional assessment, Inflatable Boats provides repair and restoration for inflatable boats. You can also explore its accessories and spare parts when a repair involves a component that needs attention.
Discuss your inflatable boat repair needs with Inflatable Boats and take the next step towards getting back on the water.
Frequently Asked Questions
Is two-part glue always the best choice for Hypalon repairs?
No. The answer to “what is the best glue for Hypalon repairs” depends on the adhesive and repair, not just whether it has one or two parts. A two-part system adds a mixing step, so consider whether you can follow its procedure and apply it within the stated working time. Check the label for the intended fabric and use, and don’t assume another brand’s ratio or timing applies.
Can I use PVC glue on a Hypalon boat?
Don’t assume PVC glue is suitable for a Hypalon boat. A product described only as an inflatable-boat adhesive doesn’t necessarily identify which coated fabric it can bond to. Look for explicit wording about Hypalon or compatible fabric in its product information. If the boat’s documentation or material guidance doesn’t establish whether it’s PVC or Hypalon, resolve that uncertainty before choosing glue. Appearance alone can mislead.
How long does Hypalon repair glue take to cure?
There isn’t one cure time that applies to every Hypalon adhesive. Check the instructions for your product, including any waiting periods between coats, after assembly and before the boat can be inflated or used. A surface that feels dry may not have reached the specified full cure. Don’t plan a launch based on touch alone. Follow the product’s cure guidance for the conditions of your repair.
What happens if Hypalon adhesive is applied in humid or damp conditions?
Moisture or humidity outside the product’s stated working conditions can interfere with application or bonding. Check the adhesive instructions before setting up, and wait if you can’t meet the specified conditions. Polymarine’s guide warns that humid conditions can cause its adhesive to bloom. That is a product-specific caution, not a rule for all formulations. Follow the guidance for the adhesive you’re using.
Can I use household or general-purpose glue to patch a Hypalon boat?
Household or general-purpose glue isn’t a dependable substitute for an adhesive specified for Hypalon or a compatible fabric. A broad “waterproof” claim doesn’t establish suitability for flexible boat fabric or for the repair you’re undertaking. Check the product information for fabric compatibility and intended use. If the damage is more than a straightforward patch or you’re uncertain about the material, have the repair assessed rather than relying on an unverified glue.
Is it safe to use Hypalon adhesive indoors?
That depends on the adhesive and its safety instructions. Some repair products involve flammable solvent vapours, so a closed room or nearby ignition source may be unsafe. Read the label and safety information before opening or mixing the product, and follow its ventilation and handling directions. If the instructions warn against naked flames, keep gas fires and other ignition sources away. Don’t assume indoor use is safe simply because the repair is small.
When should I get a Hypalon boat professionally repaired?
Seek professional assessment for extensive or recurring damage, or damage close to a seam, fitting or structural area. A patch that repeatedly lifts, for example, may indicate an underlying problem that another layer of glue won’t address. Pause if you can’t identify the fabric or determine the right repair method. Inflatable Boats provides repair and restoration for inflatable boats. Don’t treat adhesive selection alone as proof that a repair is suitable.