
5 Winter Paddle Boarding Tips for Cold Water Safety and Gear
Cold-water safety starts before your board reaches the water. The most useful winter paddle boarding tips are to stay close to shore, dress for immersion as well as air temperature, and paddle with a buddy or share your route and expected return time with someone. A clear plan can help you respond if conditions change or you fall in.
Winter paddling can bring calm water and a welcome stretch of open-air adventure, but cold hands, wet layers and an exposed route can quickly make an outing uncomfortable. The right preparation helps you stay warmer and make considered decisions on the water.
Here’s how to choose protective layers, manage gloves and booties, check conditions and share a practical outing plan before you launch. The aim is to enjoy your paddle while keeping a safer route back within reach.
Key Takeaways
- Choose a route close to shore and check the forecast before launching, so you can adapt to changing wind and weather.
- Dress for the chance of getting wet: choose suitable thermal protection and layers that help shield you from wind.
- Protect your hands and feet with gloves and flexible, warm footwear, and pack dry spares in case your gear gets wet.
- Cover exposed legs with suitable quick-drying or waterproof layers, and avoid cotton next to your skin in cold conditions.
- Paddle with a buddy where possible; otherwise, share your route and expected return time with someone before setting out.
1. Staying close to shore in cold water
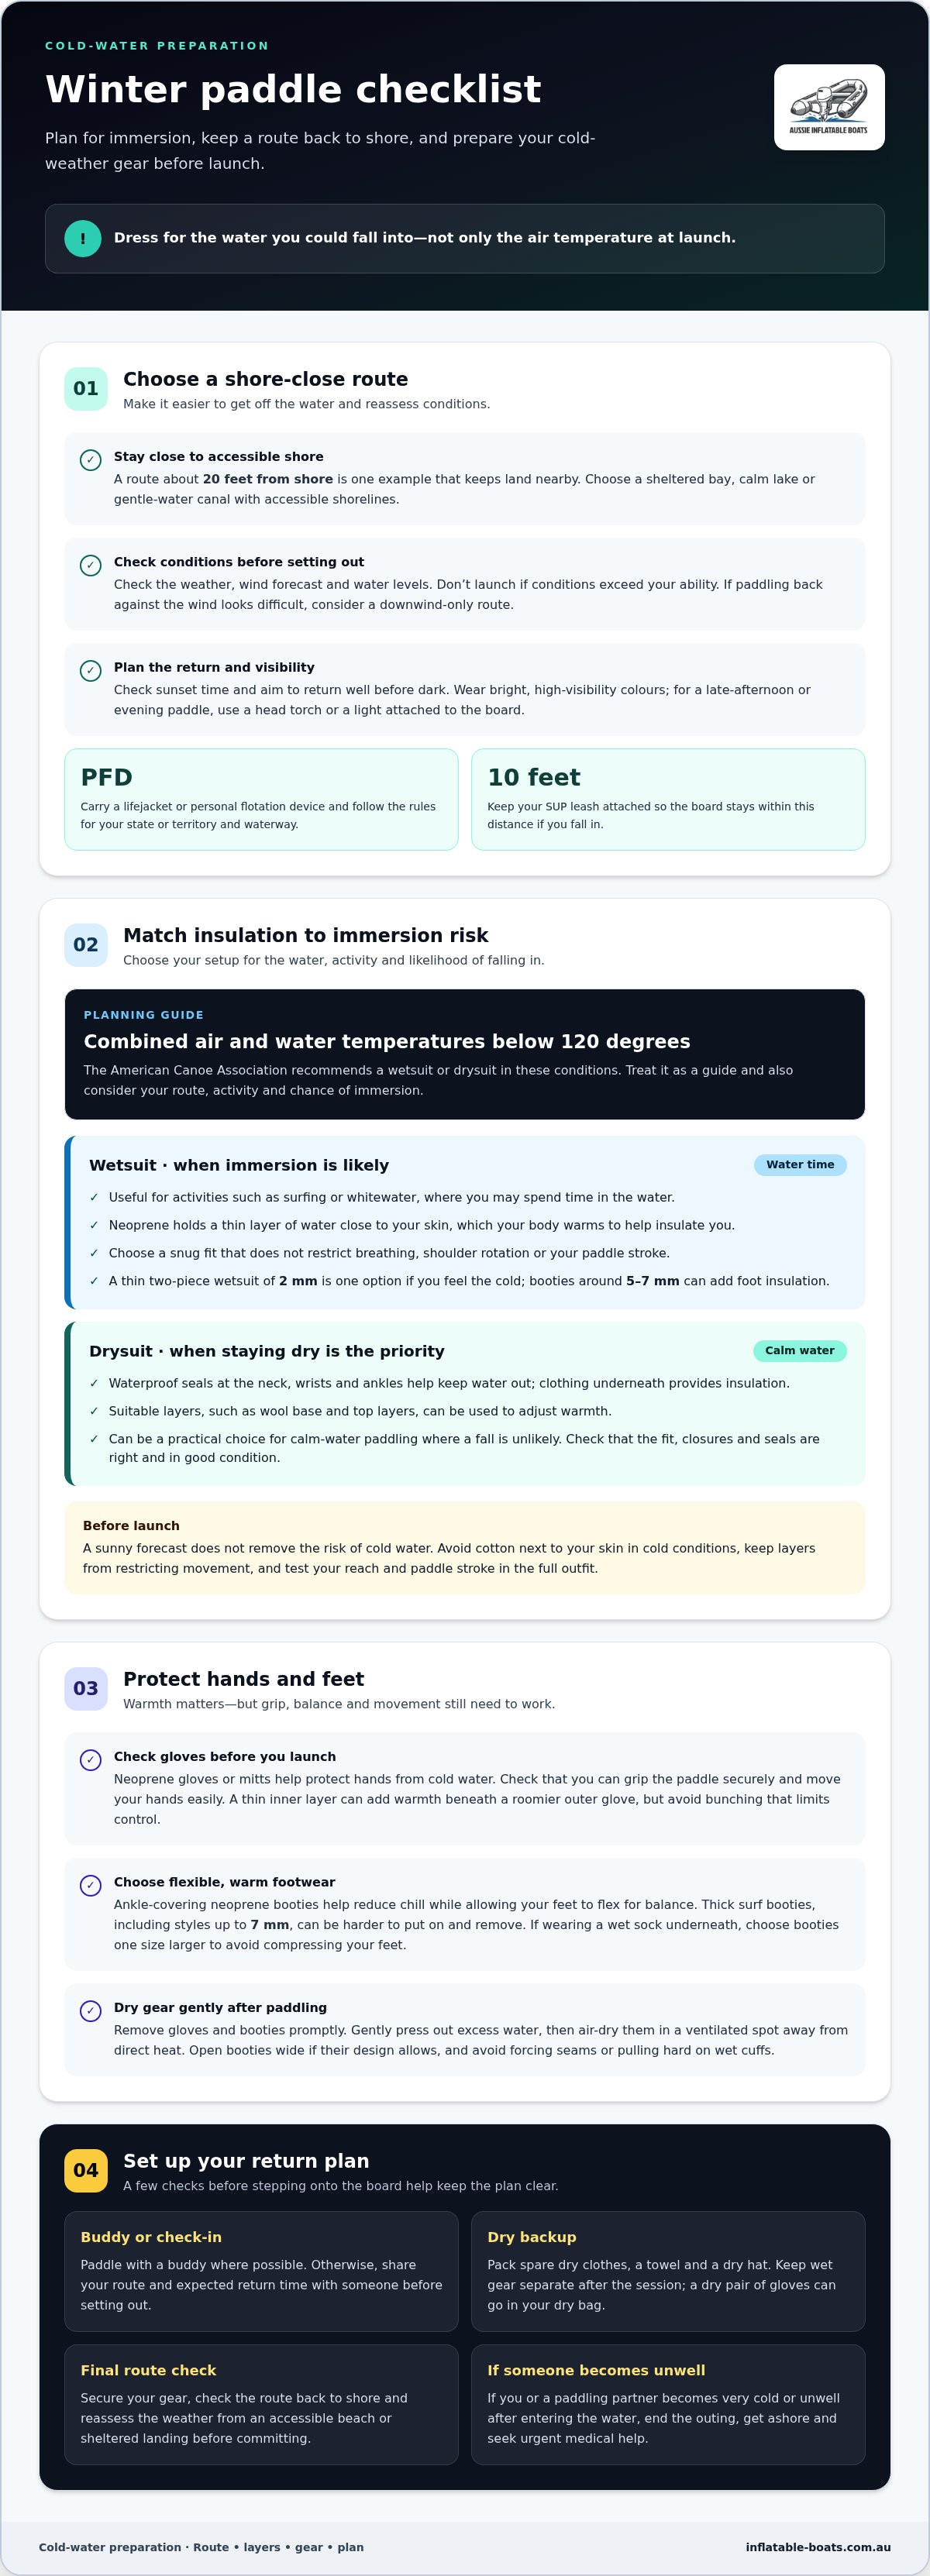
Cold water can turn a minor mishap into a serious challenge. Keep your route close to shore so you can get off the water quickly and remain easier to see or locate if something goes wrong. As a practical example, a route about 20 feet from shore can still allow a long paddle session while keeping land nearby.
When paddling in Australia, carry a lifejacket or personal flotation device (PFD) and follow the carriage or wear requirements for your state or territory and waterway. Winter does not remove the need to follow local rules. Requirements depend on where and how you paddle.
Choose a sheltered location with accessible shorelines, such as a protected bay, calm lake or gentle-water canal, rather than an exposed route. These settings do not guarantee safe conditions: check the weather and water levels before setting out, and don’t launch if wind or water conditions exceed your ability.
Prepare before launching. Check the wind forecast when choosing your paddle time and route. Winds are often lighter in the morning or evening, when temperatures may also be colder. Check sunset time and plan to return well before dark. If the forecast suggests paddling back against the wind will be difficult, consider a downwind-only route.
Wear bright, high-visibility colours so boaters can spot you, including offshore in larger conditions. For a late-afternoon or evening paddle, use a head torch or a light that attaches to the board. Keep your SUP leash attached, so the board stays within 10 feet if you fall in.
Dress for the conditions in layers, and wear a hat to help retain warmth. Pack a dry hat in your dry bag in case you fall in. Bring spare dry clothes and a towel, and keep wet gear separate after your session.
To reduce the risk of cold shock and hypothermia, wear clothing suited to immersion, stay near shore and avoid conditions beyond your ability. If you or a paddling partner becomes very cold or unwell after entering the water, end the outing, get ashore and seek urgent medical help.
Before stepping onto your board, secure your gear, check the route back to shore and tell someone your plan. A calm launch from an accessible beach or sheltered landing gives you a chance to reassess the weather before committing to the paddle.
2. Wetsuits for paddling in the water
Choose insulation for the water you could fall into, not just the air at launch. The American Canoe Association recommends a wetsuit or drysuit when combined air and water temperatures are less than 120 degrees. Treat this as a planning guide, then consider your route, activity and likelihood of immersion. A sunny forecast doesn’t remove the risk of cold water.
A wetsuit suits paddling where you may spend time in the water, such as surfing or whitewater. Neoprene holds a thin layer of water close to your skin, which your body warms to help insulate you. The suit should fit snugly without restricting your breathing, shoulder rotation or paddle stroke.
Thickness affects warmth and movement. If you feel the cold, a thin two-piece wetsuit that is 2 mm thick is one option. For winter paddling, wetsuit booties around 5-7 mm thick can add insulation at your feet. Match the overall setup to the conditions and your activity, rather than assuming one thickness works for every Australian waterway.
Wear a thin rash guard, polypro or SmartWool shirt beneath a wetsuit for an extra layer. A suitable base layer can also make the suit easier to remove after paddling. Avoid bulky layers that affect fit or movement, and test your reach and paddle stroke before launching.
A drysuit works differently. Waterproof seals at the neck, wrists and ankles help keep water out, while clothing worn underneath provides insulation. You can adjust warmth with suitable layers, such as wool base and top layers. For calm-water paddling where a fall is unlikely, a drysuit can be a practical choice. It still needs to fit correctly and be in good condition.
In short, choose a wetsuit for sessions where immersion is likely, and consider a drysuit for calm water when staying dry is the priority. Neither replaces a route suited to your ability or preparation for a capsize. Check that closures and seals sit correctly, then practise moving and paddling in the full outfit before setting out for a longer outing.
Before choosing your cold-water setup, consider how your board and planned conditions fit together. You can explore inflatable watercraft as part of planning the right equipment for your paddling.
3. Drying gloves and booties
Wet hands and feet can make winter paddling harder to manage. Neoprene gloves or mitts help protect your hands from cold water. Choose a style that lets you grip the paddle securely, keeps your hands warm and dry, and still allows easy movement. Test your grip and finger control before launching.
Choose your gloves separately from your layering. A thin inner layer can add warmth beneath a roomier outer glove, but avoid bunching that limits grip or paddle control. At home, test the combination by holding your paddle and changing your hand position between strokes. Cycling gloves can also help reduce callouses and improve grip in the rain while allowing steady paddling.
For feet, ankle-covering neoprene booties help reduce chill. Warm footwear must still flex enough for balance on the board. Thick surf booties, including styles up to 7 mm, can be difficult to put on and remove. If wearing a wet sock underneath, choose booties one size larger to allow a more comfortable fit without compressing your feet.
After paddling, remove gloves and booties promptly and keep them apart from dry clothing. Gently press out excess water, then air-dry the gear in a ventilated spot away from direct heat. If a bootie’s design allows, open it wide so air can reach the inside. Avoid forcing seams or pulling hard on cuffs while the neoprene is wet.
Prepare a dry backup before leaving home. Pack warm, dry gloves in your dry bag, along with a dry hat and spare clothes. If you fall in or your gloves become soaked, change them once you’re safely ashore. Keep wet gear in a separate bag or bucket in the car so it doesn’t soak your towel or change of clothes.
Booties and gloves dry at different rates, so check both before storing them. Feel inside the toes and fingertips for damp spots, and leave them to air-dry longer if needed. Storing wet neoprene in a closed bag can leave it damp for your next outing. A quick check before packing helps ensure your gear is dry for the following paddle.
On milder days, thermal dive socks may suit your feet better than bulky booties. In colder conditions, choose footwear that covers your ankles and stays flexible underfoot. Keep a dry hat in your kit, too. Protecting your head, hands and feet together makes your cold-weather gear more complete.
If your feet are very cold after paddling, don’t pour hot water over them. Use warm, not hot, water from a thermos, and change into dry socks and clothing once ashore.
4. Waterproof outer layers for exposed legs
Your legs take the wind and paddle splash directly, so plan their protection along with your top layers. For active paddling, start with a moisture-wicking base layer that draws sweat away from your skin. Add quick-drying, full-length tights, then choose an outer layer for the forecast. Avoid wearing cotton next to your skin, as damp fabric can leave you colder.
Match your layers to your effort. A steady paddle across a sheltered lake can still make you sweat, while a gentle canal cruise may call for lighter insulation if you expect to stay dry. Thermal base layers suit a lower-effort outing in dry conditions. If you’ll work harder, breathable, moisture-wicking fabric helps manage sweat beneath your outer clothing.
Wind changes the equation. A lightweight waterproof or semi-waterproof jacket can shield you on wet days, while a Gore-Tex or nylon paddling top over a wetsuit helps reduce windchill. Layer your tops so you can remove one if your effort warms you up. Keep the outer layer secure as you move, without restricting your paddle stroke.
Choose leg coverage deliberately rather than assuming a waterproof top protects your whole body. Separate waterproof trousers and a jacket can be adjusted as temperatures change, and together they help block wind and paddle splash. However, water can get through the gap between top and bottoms. Check the overlap while standing, bending and reaching for a paddle.
A drysuit offers another approach to layering: wear warm clothing underneath, such as wool base and top layers. The suit’s waterproof seals help keep water out, while the inner layers provide insulation. Before launching, inspect the suit’s fabric, closures and seals for visible damage, then make sure your layers allow comfortable movement.
After paddling, deal with damp layers promptly. Separate wet outerwear from dry clothing, and hang each item to air-dry according to its care instructions. Check inside the cuffs, waist and trouser legs, where moisture can linger. If the forecast is colder, pack dry replacement layers so you don’t have to rely on damp clothing after your session.
Use a simple clothing check before heading out: practise a full paddle stroke, squat as if stepping onto the board, and make sure your trousers stay in place. Check that your jacket covers your waist when you reach forward. If immersion is likely, treat outer layers as wind and splash protection, not as a substitute for suitable in-water insulation.
5. Paddling with a buddy or sharing your plans
A paddling partner can notice changing conditions and respond if you fall in. Before launching, agree on the route, pace and a clear meeting point ashore. If you paddle alone, tell someone where you’re going and when you expect to return. Make the plan specific enough for them to recognise if you deviate from it.
If you fall into cold water, hold on to your board and use the leash to keep it close. Remount or move towards shore if you can do so safely; a nearby buddy may be able to help. Once ashore, change into dry clothing and seek urgent medical help if you feel unwell.
Share the details someone needs to understand your outing: your launch point, intended route, landing place and expected return time. For example, describe the bay or lake access point rather than saying only that you’re paddling nearby. Include the route you’ll take back, so an unexpected delay is easier to identify.
Agree on what to do if you miss your return time. Tell your contact when to expect an update, and ask them to act if you’re overdue and can’t be reached. Set a realistic return time that includes packing up at the water’s edge. A clear arrangement is more useful than a general promise to check in later.
Before setting off, compare your plan with the day’s weather and water conditions. If the wind changes your intended route, tell your contact or buddy before continuing. Keep the outing within everyone’s abilities, and choose a route with accessible landing points. That gives the group practical options if someone needs to stop early.
Before a buddy paddle, discuss how you’ll stay together and what each person will do if someone falls in. One paddler can stay nearby while the other focuses on getting back aboard or reaching shore. Keep it practical: agree on a signal, a meeting point and how you’ll respond if the group becomes separated.
A solo paddling plan should cover the same essentials, plus a firm check-in after landing. If your route or return time changes, update the person holding your itinerary. Don’t leave them guessing whether a delay is harmless. A clear plan makes the next step easier to identify when the outing doesn’t go as expected.
Prepare your winter paddling setup with the route, buddy plan and return check-in in mind. Explore equipment for your paddling setup as you organise your next outing.
Inflatable Boats: Inflatable Boats
Inflatable Boats offers inflatable stand-up paddle boards for paddlers heading out on the water. Pair a suitable board with thoughtful cold-water preparation, and plan your outing around the conditions, your clothing and your experience. The company also offers inflatable boat accessories, spare parts and repair services.
Use this guide to plan your route, prepare suitable layers and share your plans before heading out. The right equipment supports your outing, but it doesn’t replace sound decisions about the weather, water conditions or your safety.
Contact Inflatable Boats to discuss inflatable watercraft, accessories, spare parts and repairs.
Make your next outing a deliberate one
Turn preparation into a routine: decide which conditions suit your experience, choose equipment for the outing and set a clear point at which you’ll head back. After each paddle, note what worked and what you’d change next time. Those observations can help you make better decisions as the season and conditions shift.
Use these winter paddle boarding tips as a starting point, then keep refining your approach to cold-water outings. Sound preparation gives you more room to enjoy the water and make a measured decision when the day doesn’t go to plan.
For broader boating needs, Inflatable Boats offers Inflatable Boats, Inflatable Boat Accessories and Inflatable Boat Spare parts. Explore Inflatable Boats and take the next step towards your time on the water.
Frequently Asked Questions
What should you wear for winter paddle boarding in Australia?
A useful set of winter paddle boarding tips starts with clothing suited to the water, wind and chance of immersion, not air temperature alone. For outings where you may fall in, wear an appropriate wetsuit or drysuit with layers that allow free movement. Practise reaching forward and rotating your shoulders in the full outfit before launching. Pack dry clothes for afterwards, and keep a spare layer easy to reach.
What water temperature requires a wetsuit or drysuit for SUP?
The American Canoe Association recommends a wetsuit or drysuit when combined air and water temperatures are less than 120 degrees. This is a combined-temperature guide, not a water-temperature figure alone. Consider whether your activity involves immersion, such as surfing, or calm-water paddling where a fall is less likely. Suit fit, underlayers and planned conditions also matter when choosing between neoprene insulation and waterproof protection.
What safety gear is essential for winter stand-up paddleboarding?
Take flotation equipment suitable for your location, and use a leash to help keep your board close if you fall. Bright clothing can help other water users see you, while a torch can improve visibility near dusk. Pack a dry hat, spare clothes and a towel in a dry bag. Before setting off, secure your equipment and make sure essentials are accessible, not loose on the board.
How do winter wind, tides, and weather affect paddleboarding conditions in Australia?
Wind can make the return leg more demanding, while tidal movement may affect water flow and access near launch or landing points. Rain, cloud and early darkness can also affect visibility and comfort. Check the forecast, wind and water levels before choosing a route, then reassess if conditions shift. A sheltered outing may suit the day better than an exposed crossing, particularly if the wind direction could complicate your return.
How should you plan a winter SUP route and check conditions before going out?
Plan winter paddle boarding tips around a route with accessible landing points and a straightforward return. Compare your intended route with the wind direction, forecast, water levels and sunset time. Tell someone your launch point, route and expected return, and update them if plans change. For example, a sheltered circuit gives you the option to finish early if conditions shift. Avoid routes that depend on a pace you can’t comfortably maintain.
How do inflatable and hard paddleboards compare for winter conditions?
Neither board type removes cold-water risks. Your clothing, route and ability to manage a fall still matter. Compare boards based on how you’ll transport, store and use them, then consider whether the setup suits your planned conditions. An inflatable board may suit situations where portability and storage matter, while a hard board may fit a different transport arrangement. Choose based on practical needs, not assumptions about winter safety.